
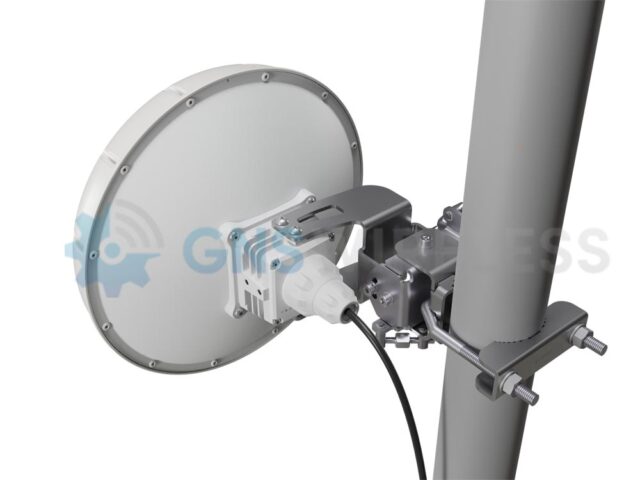
If you’ve installed the GNS-5660 nRAY60 Point-to-Point Wireless Bridge, you’re already on the fast track to delivering up to 2 Gbps of interference-free bandwidth over a distance of up to 1,400 feet. But like any high-performance wireless gear, proper setup and alignment are key to getting the most out of your investment.
In this guide, we’ll walk you through:
-
How to log into the device
-
How to check signal strength
-
How to align the antennas using built-in tools
-
How to change the IP address if needed
-
Where to get support and product details
🔐 Step 1: Log Into the Device
The GNS-5660 kit arrives pre-configured and ready to plug-and-play. However, to monitor or fine-tune the link, you’ll need to access the MikroTik interface.
IP Address Quick Reference:
| Configuration | IP Addresses |
|---|---|
| GNS Pre-Configured | 192.168.1.251 and 192.168.1.252 |
| Factory Default | 192.168.88.2 and 192.168.88.3 |
💡 To connect, set your PC to a static IP like
192.168.1.100(or192.168.88.100) and plug directly into either antenna POE injector via Ethernet, or connect both to a Ethernet switch.
Once connected, open a web browser and type the device’s IP address into the URL bar. GNS configures these to username admin, and password Admin1234.
🛠️ Step 2: How to Change the IP Address
If you’d like to assign the radios new IPs to match your local network:
-
Go to WebFig > IP > Addresses
-
Click the existing IP and update it (e.g.,
192.168.1.251/24) -
Click Apply and then OK
-
Reconnect to the new IP to continue
📊 Step 3: Check Signal Strength
From the main dashboard (QuickSet) or under WebFig > Interfaces > W60G, you’ll see a signal strength bar graph and other key metrics.
What the Signal Bars Mean:
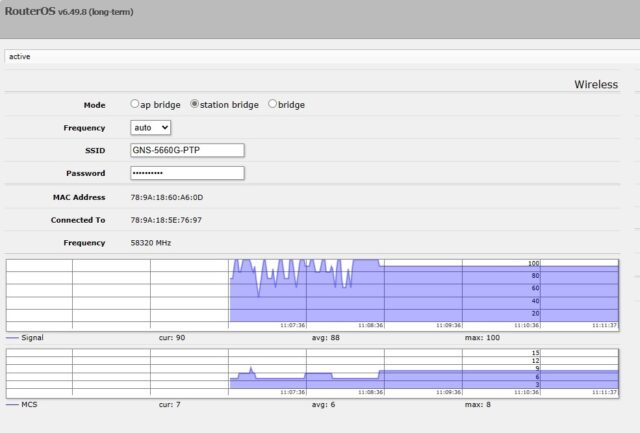
📸 Signal strength display:
The higher the signal, closer to 100, the better/stronger your link is. Maximum MCS is 9, which illustrates you have a 2 Gbps capacity link.
🎯 Step 4: Align the Antennas
Even though the GNS-5660 comes pre-paired, precise alignment ensures a rock-solid connection, especially when using 60 GHz antennas.
Use Built-in LED Indicators:
-
Look at the back of the antenna for arrow-shaped alignment LEDs
-
The arrows indicate which direction to point the antenna, however depending on your distance, these are not as precise as using the web GUI for alignment. Use the external LEDs for general confirmation that the link is established.
Fine-Tune in WebFig:
-
Monitor the signal strength as you gently adjust the direction
-
Make tiny adjustments and wait a few seconds for signal to stabilize
-
Aim for -55 to -69 dBm for best results (-55 being stronger)
🏞️ Pro Tip: Be sure there are no obstructions like trees, walls, or glass between the units. The 60 GHz band requires clear, unobstructed line of sight.
💾 Step 5: Save Your Settings
Once everything looks great:
-
Go to System > Reboot
-
Click Reboot to apply changes permanently
💡 Don’t forget to backup your configuration to simplify future troubleshooting.
📞 Need Help?
If you’re unsure about setup, alignment, or integration into your network, the experts at GNS Wireless are here to help. We offer pre-configured kits, U.S.-based support, and optional weatherproof enclosures for outdoor installs.
👉 Contact Us
📧 support@gnswireless.com
📞 (877) 209-5152
🛒 Shop the GNS-5660 Wireless Bridge Kit
Ready to get connected?
🔗 Click here to view the GNS-5660 product page
This complete kit includes:
-
(2) pre-paired 60 GHz radios
-
Gigabit PoE injectors
-
Pole mounting hardware
-
Pre-configured IPs for plug-and-play use
- 100ft. of outdoor Cat6 Cable
Looking for other wireless bridge options?
Explore more Point-to-Point Wireless Bridge Kits for any application or distance.