
Setting up a mesh Wi-Fi system is generally designed to be user-friendly, and many systems offer streamlined processes, often guided by intuitive mobile apps. Here’s a step-by-step description of the setup process for a typical mesh Wi-Fi system:
1. Unboxing and Hardware Setup:
- Start by unboxing the mesh Wi-Fi system, which typically includes multiple nodes or access points and necessary cables. Connect the primary node to your modem using an Ethernet cable. Power on the node and ensure it’s in a central location for optimal coverage.
2. Download the Mobile App:
- Most mesh Wi-Fi systems come with a dedicated mobile app that facilitates the setup process. Download the app from the App Store (for iOS devices) or Google Play Store (for Android devices).
3. Create or Log into Your Account:
- Open the app and create an account if prompted, or log in if you already have an account with the mesh Wi-Fi system provider. Account creation is often straightforward and requires basic information.
4. Follow On-Screen Instructions:
- The app typically guides you through the setup process with on-screen instructions. Follow the prompts, which may include selecting your specific mesh Wi-Fi model, confirming your network name (SSID), and setting up a secure password.
5. Place Additional Nodes:
- If your mesh Wi-Fi system includes multiple nodes, the app will guide you on where to place additional nodes for optimal coverage. Place these nodes in areas where you want to eliminate dead zones or enhance connectivity.
6. Connect Additional Nodes:
- Connect the additional nodes to power sources. In some systems, you might need to press a button on each node to initiate the connection process. The app will provide clear instructions for this step.
7. Node Recognition and Configuration:
- The app will automatically recognize the newly added nodes and configure them to work seamlessly with the primary node. This step may involve the app performing tests to determine the best placement and communication paths between nodes.
8. Network Confirmation:
- Once the setup process is complete, the app will confirm that your mesh Wi-Fi network is operational. It will likely display information such as the network name, connected devices, and signal strength.
9. Optional Advanced Settings:
- Depending on the app and the specific mesh Wi-Fi system, you may have the option to explore advanced settings. This could include features such as guest networks, parental controls, or Quality of Service (QoS) settings.
10. Monitoring and Management:
- After setup, the app serves as a central hub for monitoring and managing your mesh network. You can use it to check the status of connected devices, run speed tests, and make any necessary adjustments to the network settings.
11. Troubleshooting Assistance:
- Many apps include troubleshooting features that help users identify and resolve common issues. These may include tips for optimizing node placement, checking for interference, or ensuring firmware is up to date.
By following these steps and utilizing the user-friendly mobile app, the setup process for a mesh Wi-Fi system is typically straightforward, even for users with limited technical expertise. The guided nature of the app simplifies the configuration, making it accessible to a wide range of users.
Setting up a mesh Wi-Fi network for the first time can be a smooth process if you keep some key considerations in mind. Here are specific tips for users embarking on the setup of a mesh Wi-Fi system:
1. Understand Your Network Requirements:
- Before starting the setup process, consider your specific network requirements. Identify areas with poor Wi-Fi coverage, understand the number of connected devices, and have a sense of the overall layout of your home or office.
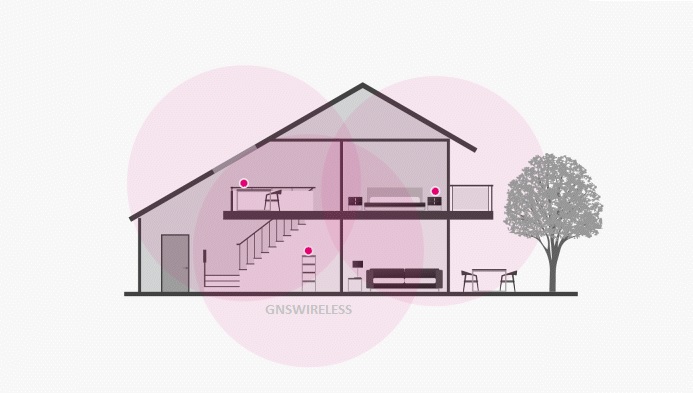
2. Choose Optimal Node Placement:
- Strategic node placement is crucial for effective mesh network performance. Place the primary node in a central location and position additional nodes in areas where you want to eliminate dead zones. Avoid interference from physical obstacles like walls and large electronic devices.
3. Check for Firmware Updates:
- Before starting the setup, check for firmware updates for your mesh Wi-Fi system. Updating to the latest firmware ensures that you benefit from any improvements, bug fixes, or new features that have been released since the initial purchase.
4. Secure Your Network:
- During the setup process, configure a strong and secure password for your Wi-Fi network. Most mesh systems guide you through this step. This password is essential for preventing unauthorized access to your network.
5. Explore Advanced Settings Carefully:
- While setting up, you might encounter advanced settings in the app. Take the time to explore these settings if you’re comfortable doing so. This could include features like guest networks, parental controls, or Quality of Service (QoS) settings. Adjust them based on your preferences.
6. Test Speeds and Connectivity:
- After completing the setup, run speed tests in different areas of your home or office to ensure that the mesh network is delivering consistent performance. This helps identify any areas that may need further optimization or node adjustment.
7. Check for Interference:
- Be mindful of potential sources of interference, such as other electronic devices or neighboring Wi-Fi networks. The app or system documentation may offer guidance on selecting optimal channels to minimize interference.
8. Explore Mesh Network Monitoring:
- Familiarize yourself with the monitoring features in the app. Most mesh Wi-Fi systems provide insights into connected devices, network usage, and signal strength. Regularly check these metrics to stay informed about the health of your network.
9. Consider Network Expansion:
- If you anticipate future expansion or changes in your network needs, plan for it during the initial setup. Mesh systems are designed to be scalable, so adding more nodes in the future is typically straightforward.
10. Keep System Documentation Handy:
- Keep the user manual or documentation provided with your mesh Wi-Fi system handy. It can be a valuable resource for troubleshooting, understanding advanced features, or referring to specific setup steps.
11. Explore Customer Support Resources:
- Familiarize yourself with the customer support resources offered by the mesh Wi-Fi system provider. This could include online forums, knowledge bases, or direct customer support channels. Knowing where to find help can be useful if you encounter any issues.
By considering these tips, users can approach the setup of a mesh Wi-Fi network with confidence, ensuring optimal performance and reliability from the outset.
Here are some of the well-known indoor mesh Wi-Fi systems:
-
Google Nest Wifi:
- Developed by Google, Nest Wifi is a mesh Wi-Fi system that includes a router and additional nodes to extend coverage. It is known for its user-friendly setup process and integration with the Google Home app. The nodes also double as smart speakers.
-
Eero:
- Eero is a mesh Wi-Fi system that gained popularity for its simple setup and sleek design. It is designed to provide reliable coverage throughout the home. Eero systems often include features such as advanced security and parental controls.
-
Netgear Orbi:
- Orbi, produced by Netgear, is a mesh Wi-Fi system known for its strong performance and coverage. It often uses a dedicated wireless channel for communication between nodes, enhancing data transfer speeds. Orbi systems come in various configurations to suit different needs.
-
TP-Link Deco:
- TP-Link Deco is a series of mesh Wi-Fi systems offering a range of options for users. It is known for its affordability and reliable coverage. TP-Link Deco systems typically feature easy setup and management through a mobile app.
-
Linksys Velop:
- Velop, from Linksys, is a mesh Wi-Fi system that focuses on delivering high performance and scalability. It is designed to provide seamless coverage in larger homes or offices. Velop systems often feature advanced settings and tri-band technology.
-
AmpliFi HD:
- The AmpliFi HD mesh system, by Ubiquiti Networks, is known for its sleek design and easy setup. It offers reliable coverage and includes a base router and additional mesh points. AmpliFi HD is suitable for both residential and commercial use.
-
Asus AiMesh:
- AiMesh is Asus’s mesh Wi-Fi solution, designed to work with compatible Asus routers. It allows users to create a mesh network using multiple Asus routers, providing flexibility and scalability. AiMesh often integrates with the Asus Router app for management.
-
Samsung SmartThings Wifi:
- Samsung SmartThings Wifi combines mesh Wi-Fi with smart home functionality. It is known for its integration with Samsung’s SmartThings platform, allowing users to control smart home devices. The system is designed for easy setup and management.
-
D-Link Covr:
- Covr, by D-Link, is a mesh Wi-Fi system designed for seamless coverage and performance. It often features a dedicated backhaul channel for communication between nodes, ensuring efficient data transfer.
Here are some popular outdoor Wi-Fi mesh systems:
-
Cambium Networks XV2:
- Cambium Networks outdoor access points designed to extend Wi-Fi coverage in outdoor, rugged environments. These access points are part of Cambiums wide ecosystem, known for its professional-grade networking solutions.
-
Grandstream:
- Grandstream offers a range of 802.11AX access points for extending Wi-Fi outdoors. This mesh point is designed to work with the external omni-directional antenna system and provides seamless coverage in the construction yard or other outdoor spaces like RV Parks and Marinas.
-
Aruba Instant On Outdoor Access Points:
- Aruba Networks provides outdoor access points as part of their Instant On series. These access points are designed for simplicity and are suitable for small and medium-sized outdoor spaces.